If you enjoy this how-to guide and decide to grab one of the items listed, please consider clicking through one of my links before you buy. I earn a small commission at no cost to you, which helps support this site and keep these informative guides coming. Thanks!
If you’re like most home producers, you bought studio monitors to get a quality sound out of your DAW to help with mixing and mastering your tracks. Monitors inevitably have a flatter frequency response than headphones and give a far better perspective as to what your published tracks will sound like in the real world. Monitors, however, are just one piece in the puzzle when putting together a good master. In addition to quality monitors, you’ll also need acoustic treatment and calibration to get a perfectly balanced and flat frequency response in any studio environment. That’s where calibration software like Sonarworks Reference 4 Studio comes in.
(For this tutorial, you’ll need Sonarworks Reference 4 Studio and either the Sonarworks XREF 20 mic or another room measurement mic like the Dayton EMM-6 or the EarthWorks M23. If you don’t already own Reference 4, check out my complete review of Sonarworks Reference 4 Studio here.)
Why Do I Need Calibration?
When you play your tracks through your studio monitors, the sound waves don’t just come out to your ears and stop – they keep going past your head and hit the walls, floors, and objects in the room. When those sound waves hit those surfaces, some of them reflect back to your ears and inevitably color the sound that you hear. Left uncalibrated, your room will trick you into setting EQ curves in your mixes to compensate, which throws off the balance of your master. If you’ve ever mastered a track that you’re really proud of only to play it back elsewhere and hear a harsh, muddy, or tinny mess, you’re probably a victim of poor calibration.
There is no such thing as an acoustically perfect space. You can add acoustic treatment, bass traps, soundproofing, and everything else under the sun, but your listening environment will always have some frequencies that ring or echo too loudly and others that cancel out or are ‘trapped’ by the empty space in your room. When you mix and master your tracks, those peaks and valleys in the perceived sound will inevitably color your tracks. That’s why when you play a track that you created somewhere else it sounds so differently – it’s not just the difference in the speakers, it’s the variation in room acoustics. The goal with calibration is to compensate for those variations and make the sound coming out of your monitors as close to flat as possible, giving you true monitoring of your tracks while you mix and master and ultimately translating into better balance in your published tracks.
Let’s go through the process of calibrating your studio monitors step by step:
Step 1 – Install Sonarworks Reference 4 Studio and open Reference 4 Measure
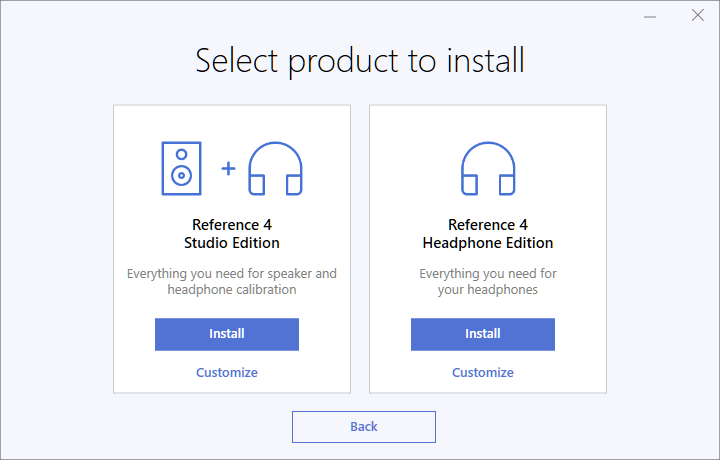
After downloading the Sonarworks Reference 4 Studio installer, run it, and choose Studio edition. This installs everything you need for measuring and applying calibration to both your studio monitors and your headphones, including:
- Reference 4 Systemwide – An application that runs in the background on your computer and applies calibration to all of the sounds coming out of your monitors and headphones. This can be left running all the time, or you can turn it off when you’re not making music to save on CPU usage.
- Reference 4 DAW Plugin – A VST, AAX, RTAS, or AU plugin that is inserted at the end of your effects chain – typically as the last effect on your master buss – that is enabled during mixing and mastering to apply calibration to the sound coming out of your DAW. The DAW plugin is then disabled before exporting/bouncing the track for distribution. (If you’re running Reference 4 Systemwide, you don’t need to also run the DAW Plugin, and vice versa.)
- Reference 4 Measure – The monitor measurement and calibration software, which walks you step-by-step through building a calibration profile for your studio monitors to use in Reference 4 Systemwide or DAW Plugin.
After the installation is complete, it’s time to open Reference 4 Measure and start building your profile:
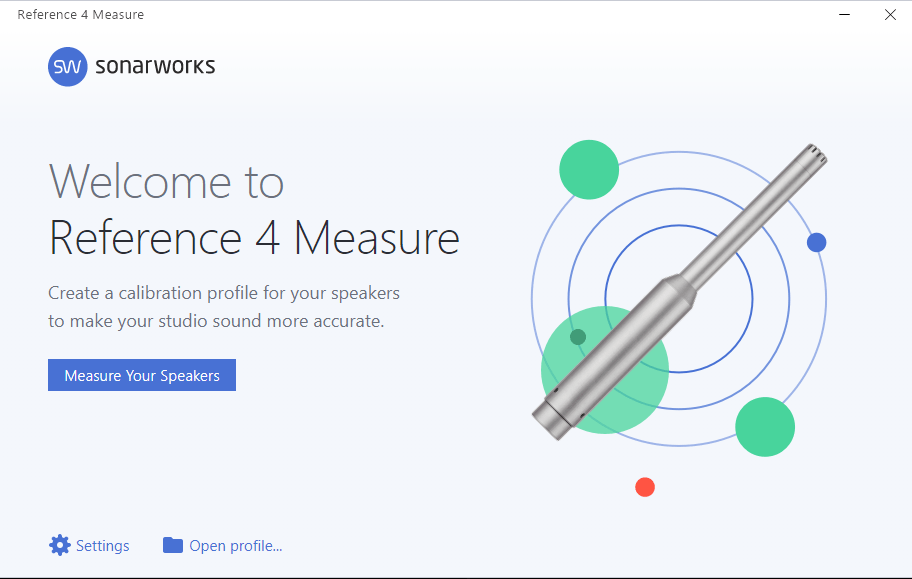
Click “Measure Your Speakers” to start the process. You’ll need about 20 minutes and your calibration microphone.
Step 2 – Follow the Setup Checklist
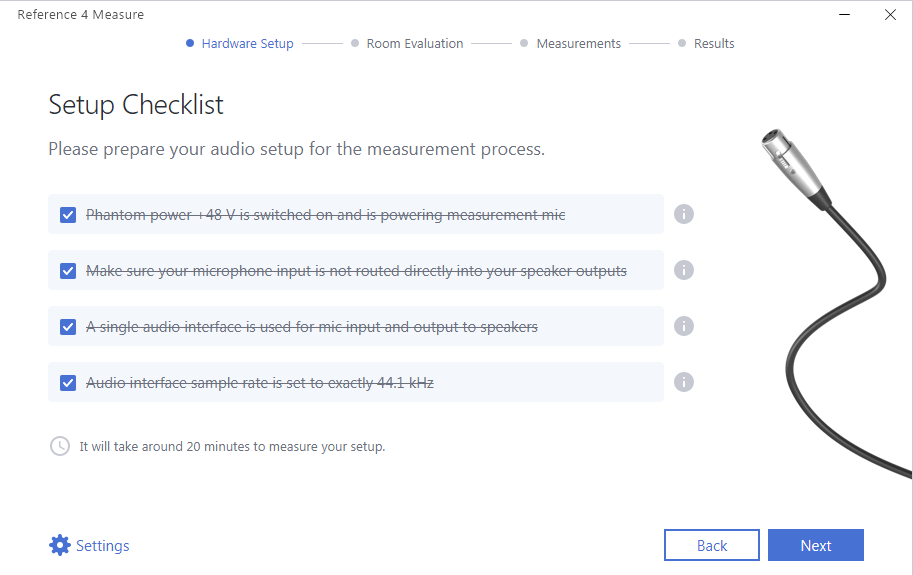
The setup checklist walks you through setting up your calibration mic and audio interface to complete the calibration profile. The steps are:
- Plug in the measurement mic and turn on phantom power. For the sake of simplicity in the next step, I recommend plugging it into the first input on your interface. You’ll also want to make sure you have it set to mic/line and not instrument, and disable any pad.
- Turn the direct monitoring on your interface OFF. This prevents the mic from feeding back through your monitors, which will taint the calibration profile and can possibly damage the mic, monitors, or both. For most interfaces, the direct monitoring knob is turned all the way to the right to enable only output and no direct monitoring. You can tell it’s done correctly if you talk into the mic and don’t hear anything through your monitors but see the signal/clip lights flash as you talk.
- Make sure that you’re using the same interface for the mic input and monitor output. For most people, this is not an issue, but if you have more than one interface you should make sure you’re using a single interface for your monitor calibration profile, as using multiple interfaces won’t always work correctly.
- Set your audio interface’s sample rate to exactly 44.1kHz. Some audio interfaces will automatically adjust to the sample rate of the software, while others will require adjustment in the interface’s control panel. Consult the manual for your interface if you’re not sure how to set the sample rate.
Step 3 – Select Your Measurement Mic and Measurement Profile
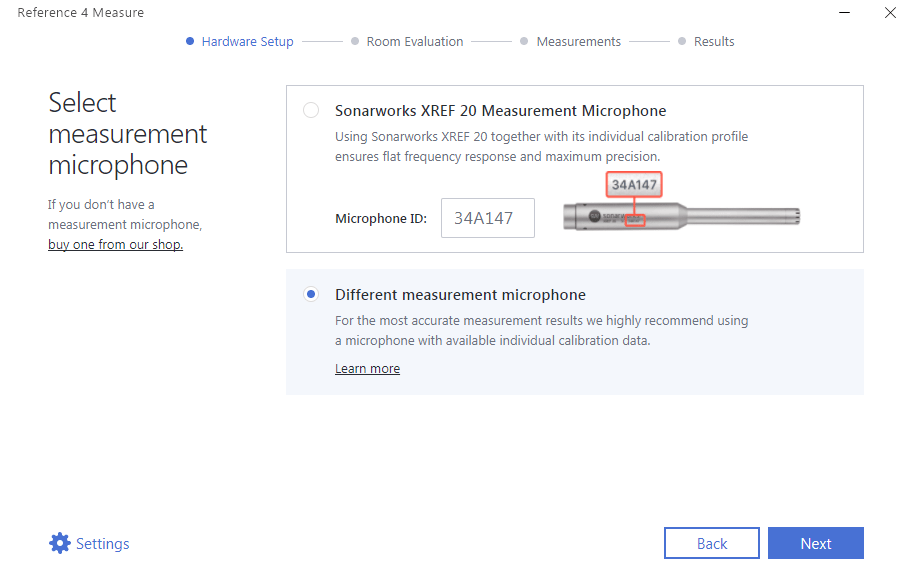
If you bought a Sonarworks XREF 20 Measurement Mic, select that option and enter the microphone’s ID found on the body of the mic. This will load a calibration profile for the mic automatically, and you’re ready to head to step 4. If you are using a different measurement mic like the Dayton EMM-6 or the EarthWorks M23, you’ll want to select “Different measurement microphone” and proceed to the next screen. Locate the mic calibration profile for your mic on your computer’s hard drive and load it into Reference 4.
If you don’t have the calibration file for your mic, you can typically download it from the manufacturer’s website. If the manufacturer of your measurement mic doesn’t provide calibration files, you can still build a monitor calibration profile with Reference 4 Measure, but understand that your final calibration will be off.
How far off depends on the mic. Without a calibration profile, Reference 4 Measure will assume a perfectly flat response, which will never be the case due to the tiny variations in frequency response for even the most expensive calibration mics. If at all possible, you should purchase a mic that has a calibration file, as going without can possibly skew your results, but any calibration will certainly be better than no calibration at all.
Step 4 – Select Your Input and Output Device
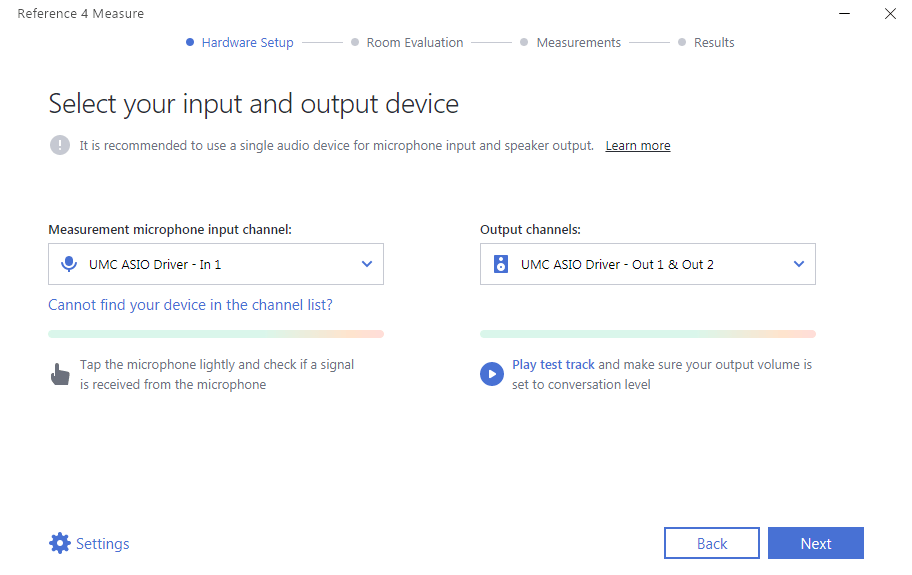
Next you’ll need to select the correct input and output from your interface. In the drop-downs, locate your interface, then the correct input you plugged the mic into on the list on the left. Then, find the correct output for your interface on the right. Once you’ve located both, tap on the mic to make sure that the meter on the screen moves, but that you don’t hear it through the speakers. (If you do hear the mic, stop and make sure that your direct monitoring is completely disabled before you proceed. Consult your interface’s manual for instructions on how to adjust or disable direct monitoring if you’re not sure how.)
Finally, playback the test track and adjust your monitor volume until it comes out at a normal conversation level. (Yes, a normal conversation level. Not loud-mouthed like you. Just kidding.)
Step 5 – Adjust Microphone Gain
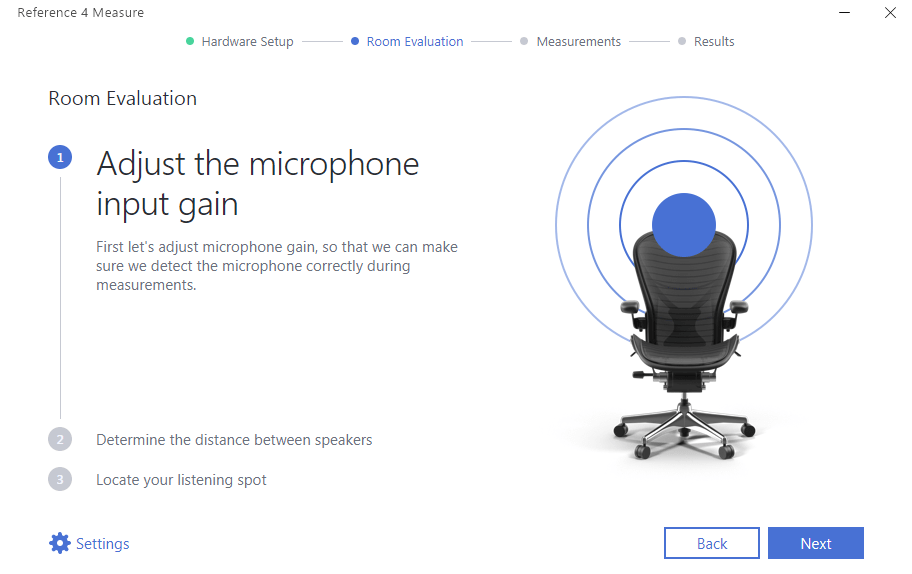
Before we can actually calibrate, we need to make sure the mic is receiving a good, strong signal, but isn’t clipping. To do that, we’ll set the mic’s input gain. Reference 4 Measure will play a series of chirpy frequency sweeps through your monitors to gauge how much sound is captured by the mic. Reference 4 Measure will walk you through positioning the mic correctly to get an accurate measurement.
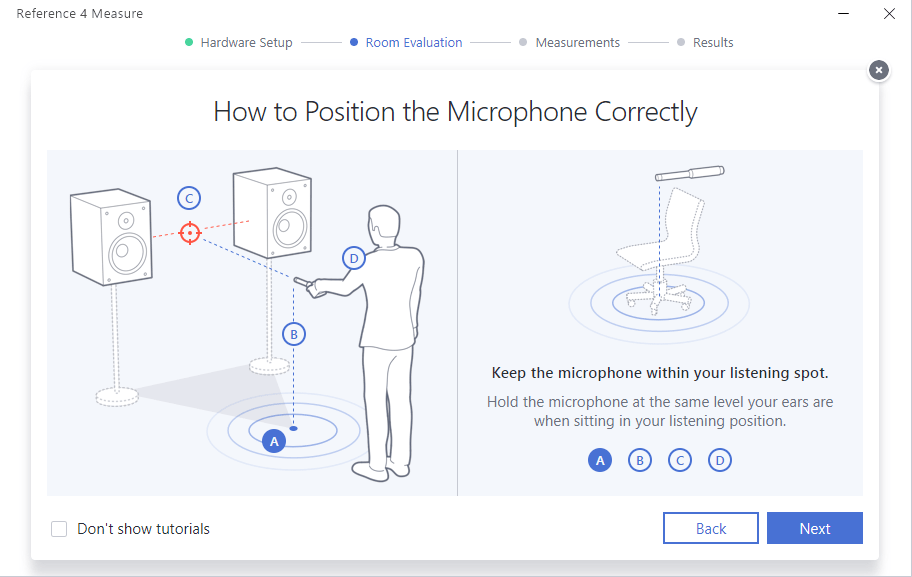
You’ll want to place the microphone exactly where your head usually is when sitting at your desk. For most, that means moving their chair out of the way and standing up between the speakers. You’ll want to ensure that both the distance between and away from the speakers are correct, as well as the height. If you have a wireless keyboard and mouse, now is the time to break those out, as you’ll want to hold the mic as steady as possible for all of the measurement steps.
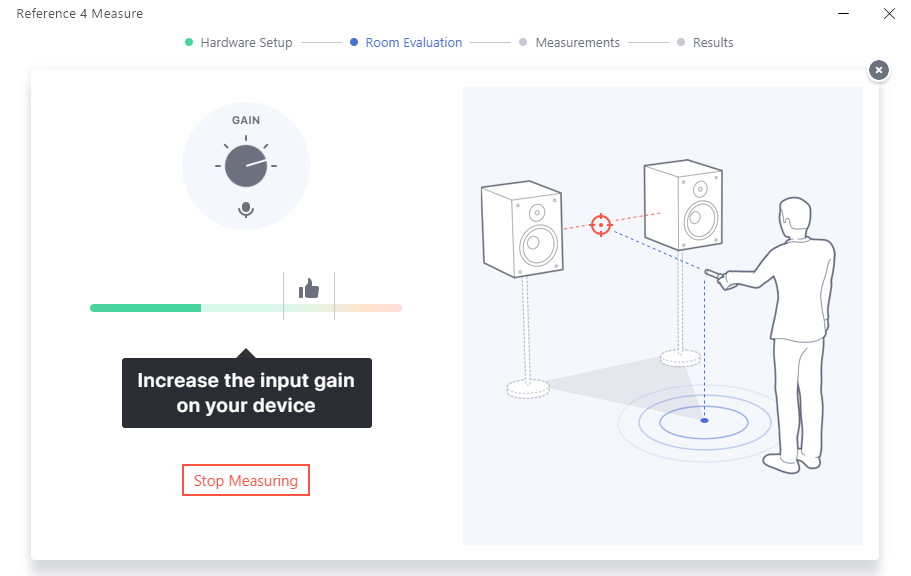
Once you’re in position, hit “Start Measuring.” A 5-second timer will count down, then the chirps will start playing. Adjust the mic input until the green bar gets to and stays in the thumbs-up butter zone. Once Reference 4 Measure detects that your gain is set properly, it will play several full sweeps to make sure your mic’s gain isn’t too high. If it is, it will have you increase your monitor’s output level and repeat the test. Continue this process until Reference 4 Measure gives you the big thumbs up of success.
Step 6 – Set Monitor Distance
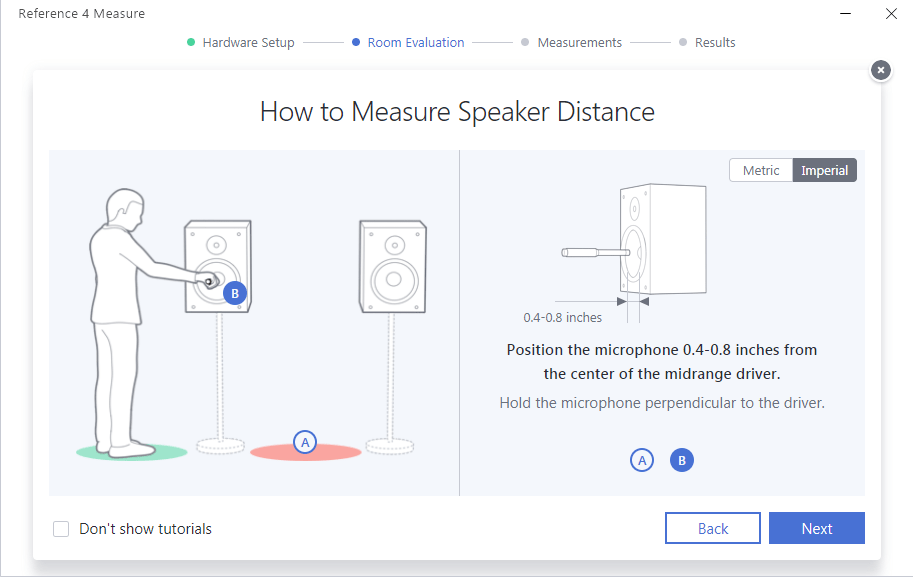
With our gain properly adjusted, we can set distance between the monitors in the software for proper trigonometric calculation. (Sound complicated? Well, it is if you’re not a student of physics. Thankfully the software does it for you.) To do that, you’ll first measure the volume of each monitor directly at the source by placing the mic less than an inch from the midrange driver. Step out from in between your monitors so the sounds don’t reflect off your body, then hit “Start Measuring.” It will play a series of sweeps, then tell you to go to the other speaker and repeat. Finally, it will have you place the mic at your listening position again and do one more short test, then show you a screen where you can adjust the dimensions that the software calculated.
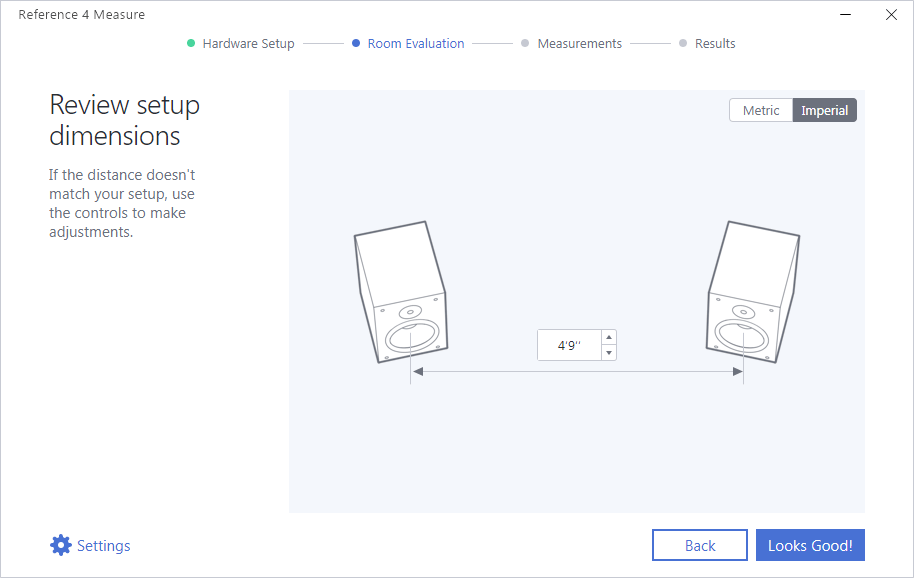
It was honestly a little eerie that the software could tell exactly how far apart my monitors are using nothing but math and physics. (Cue Thomas Dolby shouting “SCIENCE!”) I went and got a tape measure to double-check, and it was off by less than an inch. Now, one more dimensional measurement and we’re ready for calibration.
Step 7 – Locate Your Listening Spot
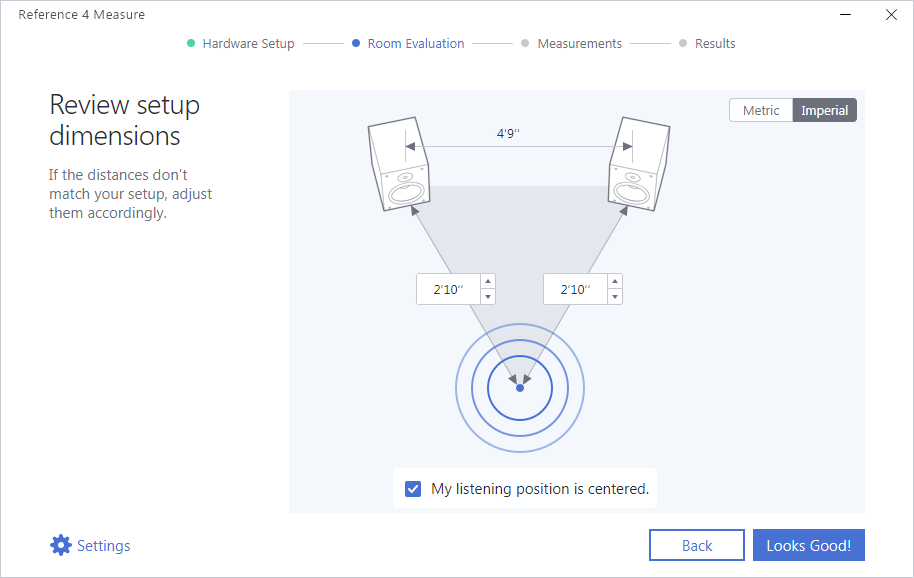
Reference 4 Measure will now tell you once again to place the mic in the listening position and play a series of sweeps. Afterward, it will bring up the screen above, where you can adjust the distance from your ears to your monitors. Again, after measuring mine was off by less than an inch. After the software was able to tell exactly where I was in space-time, I felt confident moving on to the actual calibration measurements.
Step 8 – Listening Area Measurements
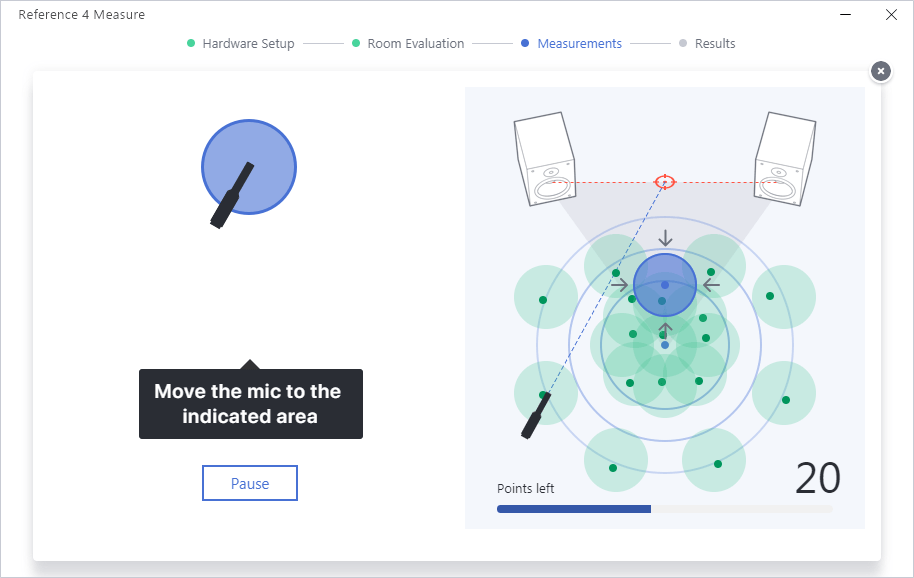
Every step through now has been preparing Sonarworks Reference 4 Measure to do some pretty nifty Jedi mind tricks. Now the actual calibration measurement phase begins, and it’s mind-blowingly cool if you’re a science nerd like me.
Reference 4 Measure will show a blue circle in a drawing that represents your speakers and carefully measured listening position, then play a series of chirps. Take the microphone, and using the drawing as a map, put it in the place in your room represented by the circle. Once Reference 4 Measure detects that you’ve put the mic in the right place, the circle will start to fill, letting you know to stop moving. After the circle fills, Reference 4 Measure starts to play frequency sweeps through your speakers.
See the number in the bottom right corner? That’s how many individual calibration points that you have left to find – mine started at 37. It sounds like a lot, but measuring all of the points individually allows Reference 4 Measure to find all of the peaks and valleys in frequency that constitute your room’s acoustic signature.
Once this has completed, you’ll be taken to a screen where you can see the results and save the profile for use.
Step 9 – Save Profile and Add Preset in Systemwide and/or DAW Plugin
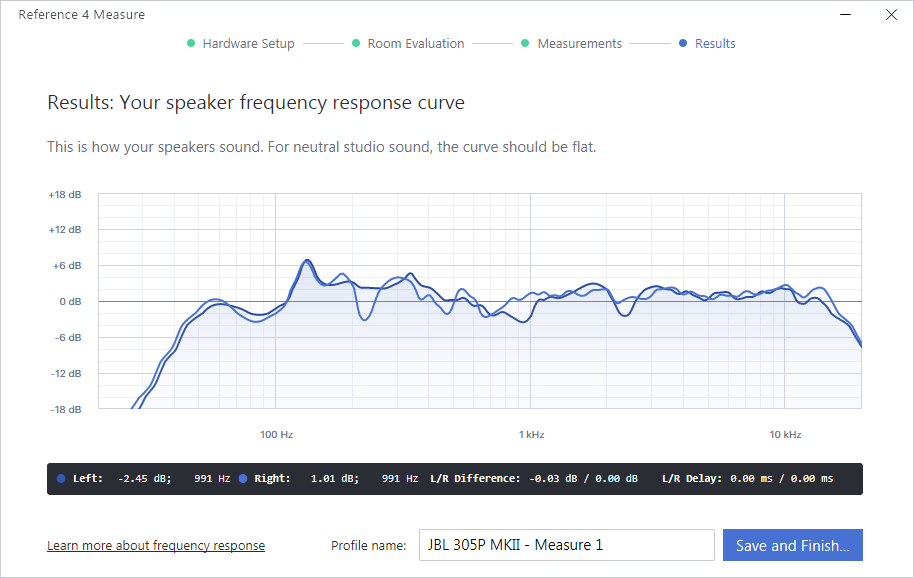
Having successfully completed all of the measurements, you have created a calibration profile that can be used to correct the variations in your listening environment. Name the profile, then hit save and finish.
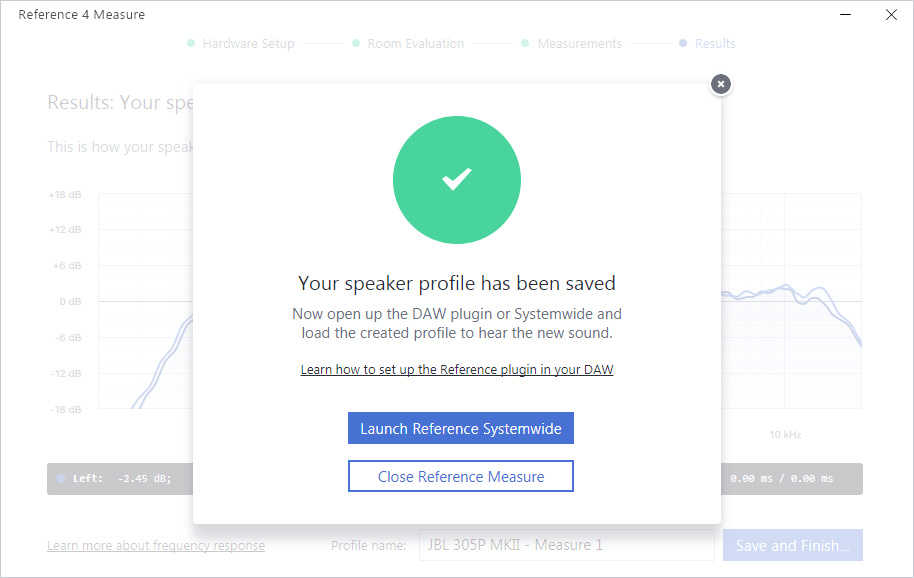
Now we’ll enable the profile. Click “Launch Reference Systemwide” to save the preset, which can also be used in the DAW plugin.
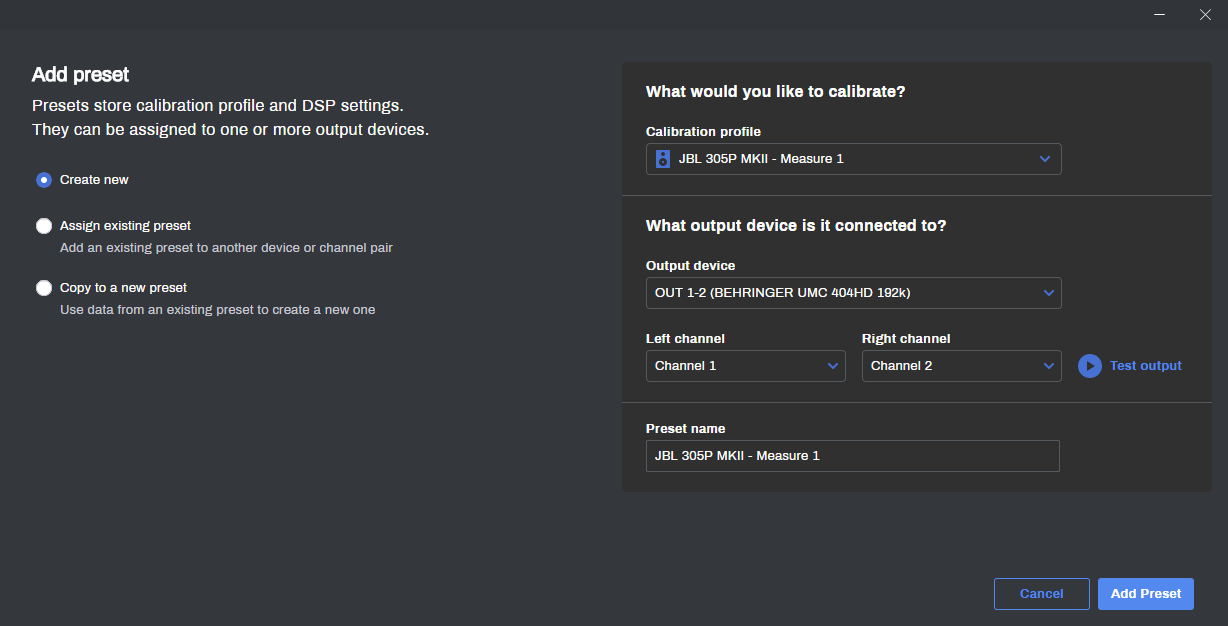
In the Add Preset dialog, select the profile you just saved, then select your output device. Click “Add Preset” and you’re ready to do some quick A/B testing.
Step 10 – A/B Test and Enjoy the Results!
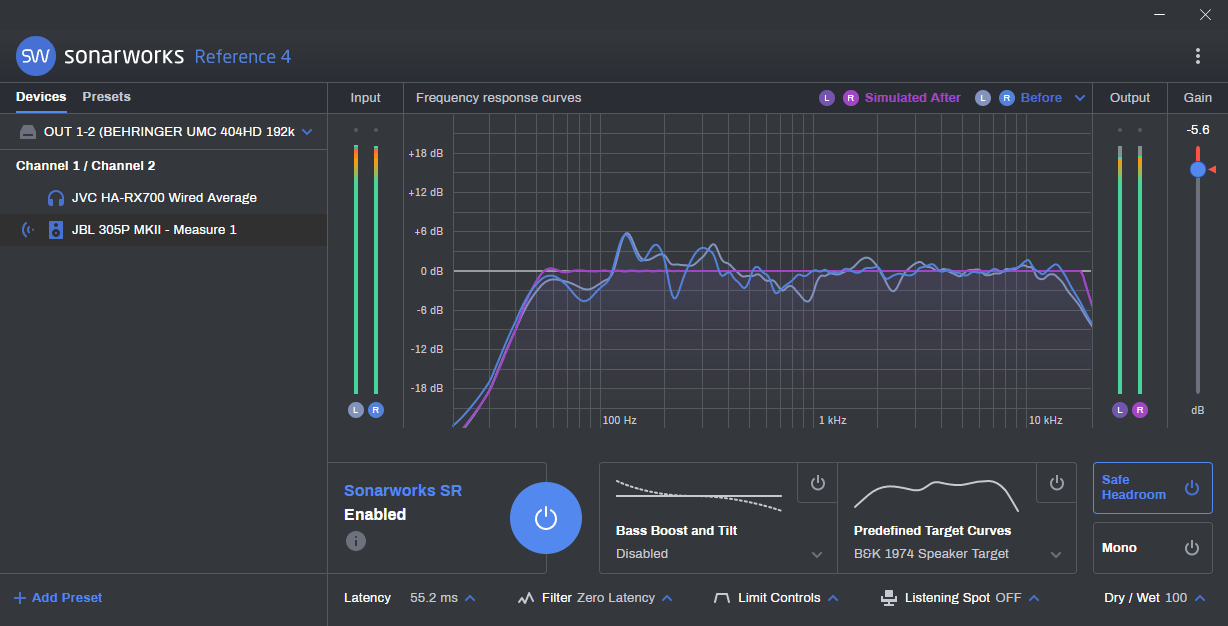
When you save your preset, Sonarworks Reference 4 Systemwide will enable it automatically. You’ll probably want to hear the results and the difference! Find a piece of music that you know well and play it. While it’s playing back, hit the big blue power button to turn it on and off a few times and listen for the difference.
Depending on how well your room is acoustically treated, it may be a slight difference, or it may be huge! For me personally, I noticed right away the change in the low frequencies as well as the lower-midrange. Upon review of some of my recent mixes, I found that I was overcompensating for my room by boosting some frequencies while cutting others. With Sonarworks Reference 4 Studio running, I can trust my ears more and know that the masters I produce should translate well to other, less perfect listening environments.

