If you enjoy this how-to guide and decide to grab one of the items listed, please consider clicking through one of my links before you buy. I earn a small commission at no cost to you, which helps support this site and keep these informative guides coming. Thanks!
When I was a broke teenager learning to play the guitar, I dreamed of one single guitar. Sure, I liked other guitars well enough, but my fantasy was to walk into my local music shop and get a brand new Gibson Les Paul Custom. I even had the color picked out: Honeyburst. Unable to fulfill that dream, I started getting into guitar modding. Based on the recommendation of a trusted music store clerk, I picked up a cheap Korean Paul knockoff made by a little-known company called Hondo and started learning how to mod.
Though the Hondo had garbage electronics, it was older than me and actually made of real wood. I replaced the pickups first and was blown away by the tonal difference. It actually sounded like a far more expensive guitar! Then, a few years later, I added two push-pull pots on the volume controls for coil splitting, allowing for five additional tones. Fifteen years later, however, those push-pulls were in sad shape, and my once-beloved Hondo mostly sat in the case. When I tried to play her, the pickups were loose and the coil-splits were broken or intermittent. I knew it was time to give her a complete makeover and restore her to her former glory.
The Mods
The fatal flaw in my old mods were the push-pull pots, which are notoriously brittle, and my lack of know-how. Since my previous mods didn’t hold up, I wanted to do this one right. My plan was simple:
- Take everything completely apart and remove all the old components, screws and hardware
- Drill holes to accommodate new parts
- Add shielding to the cavity to reduce hum
- Install brand new parts with multiple mods to maximize tonal possibilities
After a ton of research, I found this complete mod at GuitarElectronics.com. Independent Series/Split/Parallel on each humbucker, plus a Neck Pickup Phase and Neck/Bridge Parallel/Series. Four mini switches – two three-ways and two two-ways – plus the standard pickup selector switch, for a total of 48 different tones. I knew that if I pulled it off, it would be epic, and create exactly what I wanted: the Ultimate Studio Tone Monster Guitar!
I also wanted to add Treble Bleed circuits on the volume controls. A common issue with guitar volume controls is that as you reduce volume, the high-end rolls off with the volume. By adding a resistor and capacitor in parallel on the volume pots, you can retain more of the treble throughout the volume sweep, allowing for more dynamic control. Having never used Treble Bleeds before, I was guilty of almost always leaving my volume at 10 because I didn’t like the sound as I turned it down. What better time than now to also add dynamic range to my once-favorite axe?
Parts and Tools
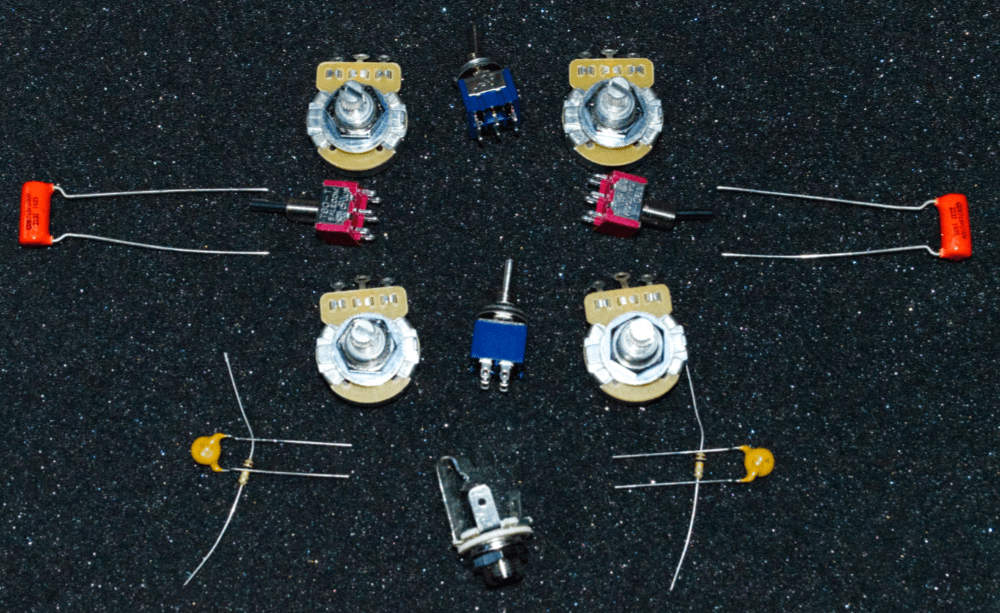
There’s a lot to this mod, but it’s so completely worth it. Here is an exhaustive part list, including the parts I already owned for reference:
- Guitar: 1979 Hondo II HDLPS-2AB, wine red
- Neck Pickup: 1980’s Seymour Duncan SH-6n Duncan Distortion creme/black (complete with SEYL sticker verifying authenticity)
- Bridge Pickup: 1980’s Schaller Golden ’50 creme
- Pickup Selector: original Hondo (Samick) – the only remaining original electronic part
- Volume and Tone Pots: Allparts CTS 500k Short Shaft Audio Taper Pots x4
- 3-Way Switches: SALECOM DPDT ON/ON/ON Guitar Mini Toggle Switches x2
- 2-Way Switches: Yueton DPDT ON/ON Guitar Mini Toggle Switches x2
- Tone Capacitors: .022uf Orange Drop Capacitors x2
- Jack: Neutrik NN11 1/4-Inch Phone Jack
- Screws (since the old ones were rusty and stripped and the pickup springs were shot): MAKA Guitar Screw Assortment Kit
- Treble Bleeds: Axegrinderz Treble Bleed Kit (comes with 4 complete sets, meaning I have two sets left over for future mods)
- Shielding: Aluminum Foil Tape
Here are the tools I used:
(Editor’s Note: I already owned nearly all of the tools, so some of the tools listed below are not the exact tools I used but are the closest representations that I could find for reference.)
- Precision Screwdriver Set
- Mechanic Deepwell Socket Set
- Soldering Iron and Stand
- Black & Decker 20V MAX Cordless Drill
- Drill Bit Set
- Dremel Rotary Tool
- Helping Hands Soldering Stand
- Wire Cutter/Stripper
- Craftsman Multimeter
I waited (im)patiently for all the parts and tools to arrive, then dove in head-first. Here’s a complete step-by-step build guide:
Step 1: Take the guitar apart
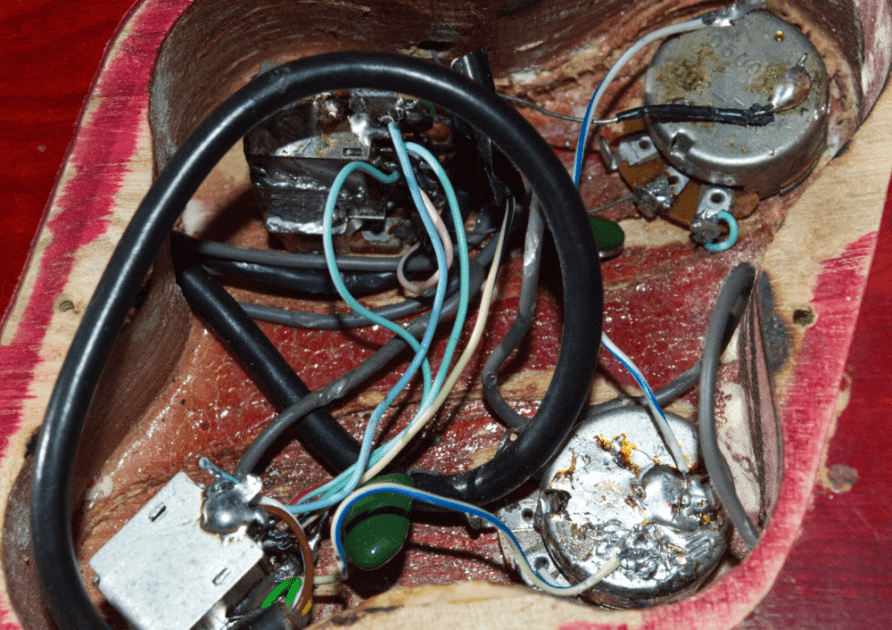
First I took the strings off and set the stop bar aside, then I pulled off the volume and tone knobs. Using a precision screwdriver set and deep-well sockets I removed and re-seated the tuners. Once that was done I moved on to the pickups, taking them completely out, removing the pickup rings, then re-installing the rings and pickups with all new screws and springs from the MAKA screw kit. Now that the issue of the pickups falling out was resolved I felt comfortable flipping the guitar over on its face and removing the backplate to expose the rat’s nest of components from my previous mod. It’s easy to see from the pic why I decided to nuke the whole thing from orbit and start over.
Step 2: Desolder and remove the old components
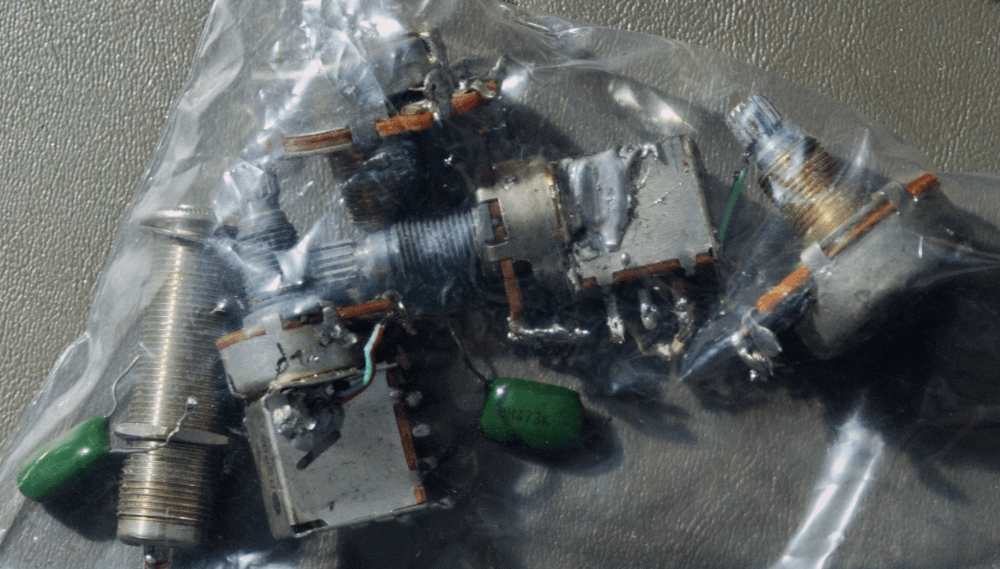
Using the deep-well sockets, I removed the nuts from the top of the existing components and pushed them through the cavity. After heating up the soldering iron I removed the two pickup leads and the switch wires, then proceeded to desolder all the rest of the components and toss them in a bag in case I needed any of them later. (Spoiler alert: I didn’t.)
Step 3: Drill holes and route or sand the cavity
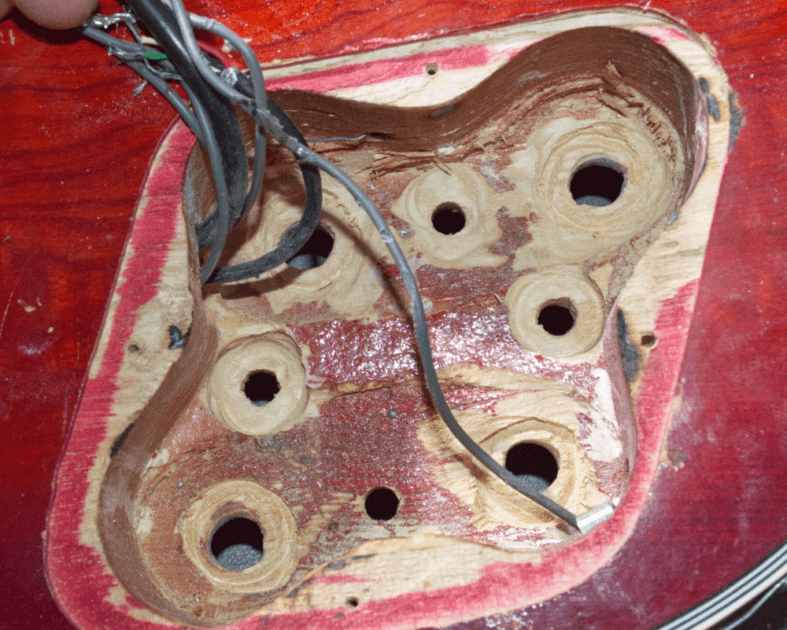
With the cavity all cleared out it was time to make room for the extra components in the mod. I decided to put the two three-way switches between the volume and tone pots for each of the pickups, then the phase and series/parallel two-way switches between the volumes and tones, respectively. To do this, I needed to drill four holes. I carefully measured the distance between the factory potentiometer holes, but I wasn’t all that surprised to find that they were not equidistant from the Samick factory in 1979. Unable to get a “perfect” measure, I did what any self-respecting modder does – I eyeballed it.
After drilling the four holes I dry-fitted the components in place. Only the three-way switch for the bridge pickup coils had enough thread sticking through the other side to secure the switch, so that meant it was time to remove some of the wood in the cavity. Starting with a spade bit, I nibbled away at each of the other seven holes, then used the Dremel with a sanding stone to take off the last little bit to properly dry-fit the controls. I made sure to take a little extra off to account for the shielding because I surely didn’t want to have to take all that back off once I put it on.
Step 4: Shield the cavity
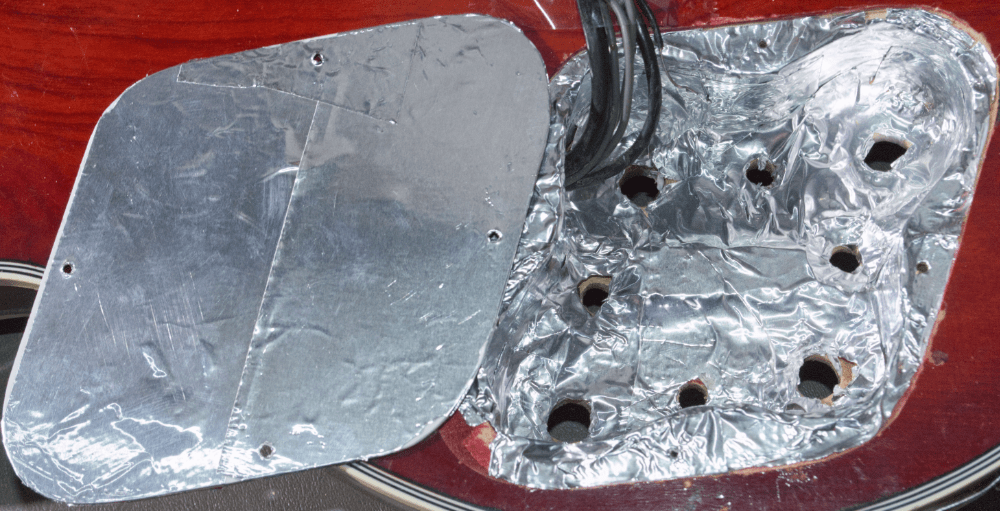
Previously this guitar’s cavity was unshielded. I hadn’t really noticed much hum in the previous configuration, however, with a whole new set of mods and components going in I didn’t want to leave anything to chance. Using the aluminum foil tape, I added shielding piece by piece until a proper Faraday cage was built up inside the cavity. I used the multimeter on the diode/continuity setting to verify that it was conducting ground from one end of the cavity to the other, then poked holes for each of the components.
Step 5: Solder together components and install
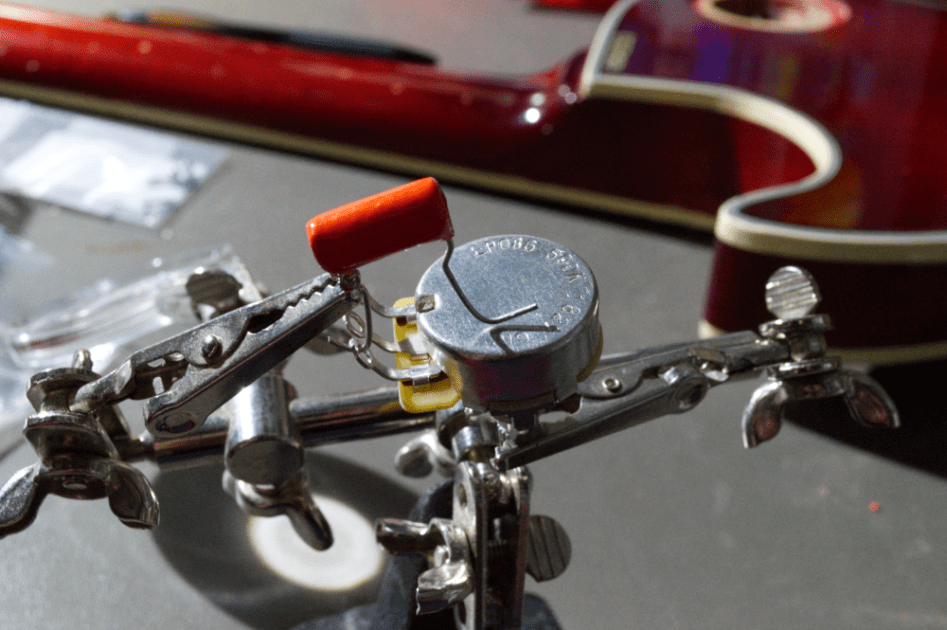
The last time I modded this guitar I did all of the soldering inside the cavity, which, in retrospect, was most certainly a mistake. Learning from that, I decided to do as much of the soldering ahead of time as possible. Starting with the capacitors on the tone pots, I worked my way through the wiring diagram one component at a time, soldering jumpers onto the individual switches and installing the leads that would go between the components. Once I had done all of the work I could outside the cavity, I installed all the components and finished up by soldering the pickup and selector switch wires on as well as the bridge ground.
Step 6: Double-check wiring
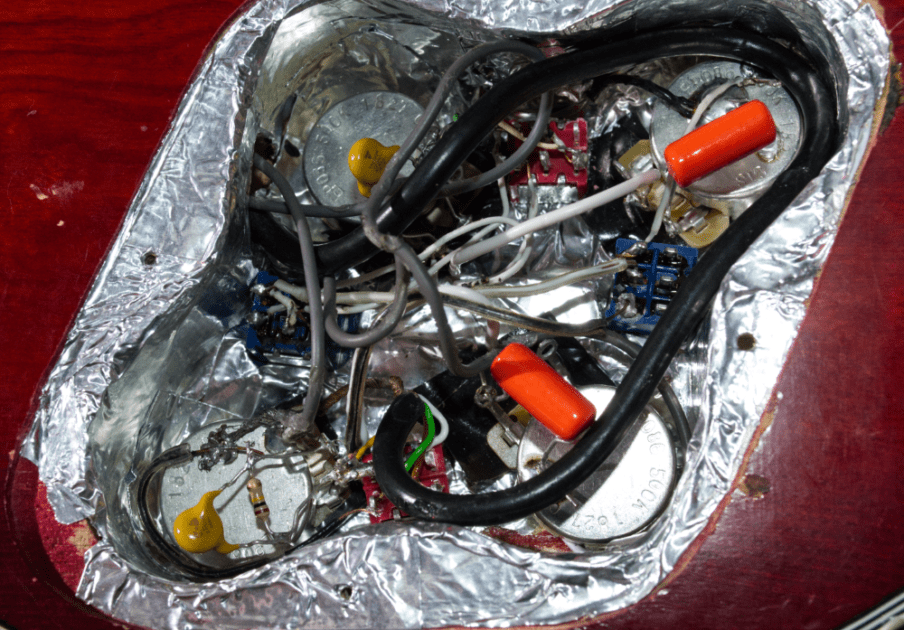
Once the last few solder joints were done, it was time to go through and check my work against this rather complicated wiring diagram. I made a copy of the diagram and went through, joint by joint, component by component, and crossed off every lead to make sure the wiring was in place. Satisfied with my visual inspection, it was time to move onto actual testing.
Step 7: Test it out
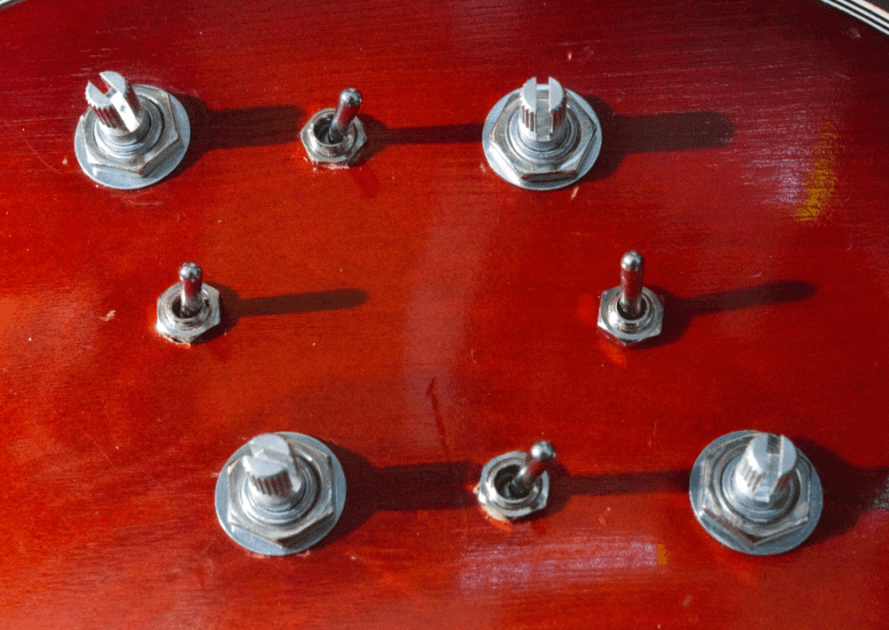
Before I risked my amplifier by plugging in my possibly faulty wiring job, I tested each switch combination with a multimeter on the diode/continuity setting. I put a guitar cable into the jack, then clipped one of the multimeter probes to the opposite tip of the cord. By touching the other probe to the individual pickup wires, I could check for a path to the tip. For example, when the pickup selector is on Neck (up position) and the Neck Pickup coil selector is on Coil Split (middle position), only the North Start (black) and North Finish (white) on my Duncan Distortion should have a path to the tip, while in parallel all four leads should have continuity. I went through and checked to make sure that the connections weren’t broken when flipping any of the other switches or adjusting the volumes or tones. When I was satisfied there were no major issues, It was time to do the amp test.
Step 8: Fix any issues
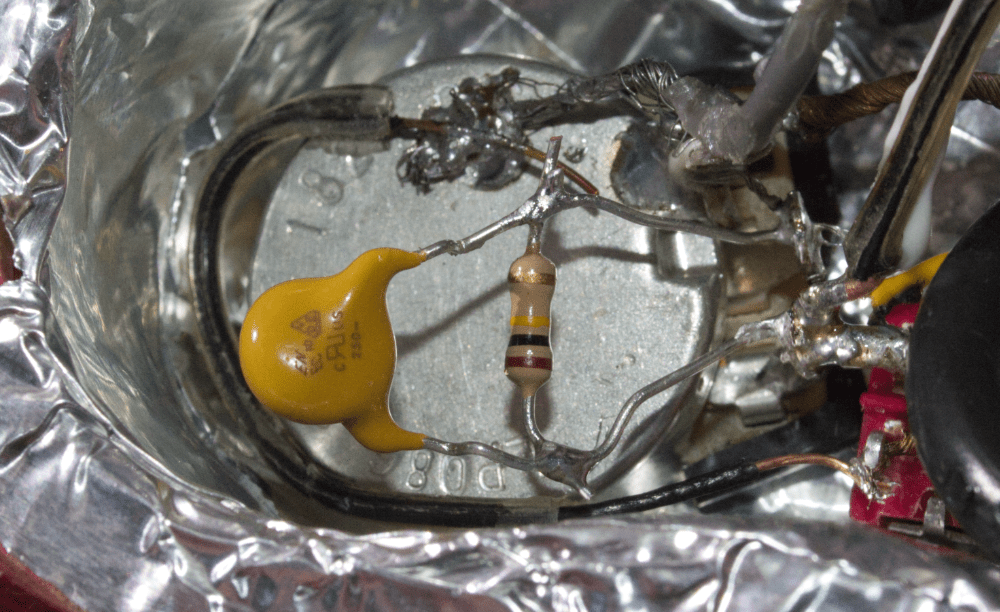
After gently tightening on the components one last time, I re-installed the tailpiece and strings and plugged her in. It sounded amazing! As I started cycling through some of the different tonal options, however, my heart sank – there were a few settings that had a very harsh high-end, no bass, and a very present hum. It was clear that I had missed a ground somewhere. I turned the amp off, flipped her over and looked through the diagram again, then realized my mistake… I never grounded the bridge coil selector. One quick solder later, it was fixed and I was ready to rock!
Step 9: Crank it!
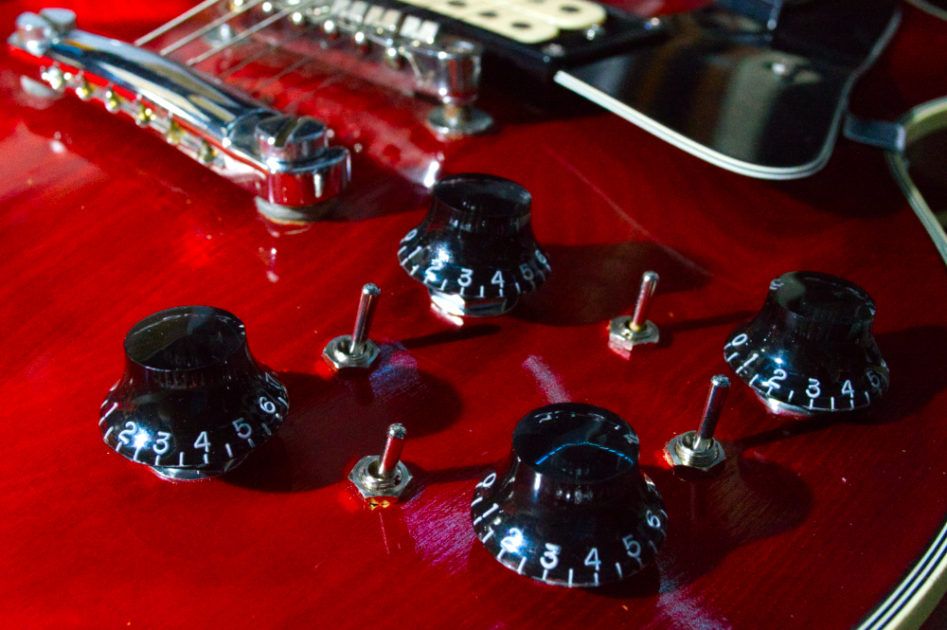
After one more test, I put everything back together – the knobs, backplates, pickguard, and the rest. Now it was time to plug her into my interface and put her through her paces with BIAS FX 2. I recorded a bunch of samples, all using the exact same preset (Dirty Stereo Blues) to showcase the tonal range. Obviously I didn’t create a sample for each and every one of the 48 settings, but these five should sum up the possibilities fairly well:
How To Build a Studio Guitar – The Bottom Line
As you can hear from the samples, flipping each of the tiny switches makes a difference in the tone – some subtle, and some huge. I am absolutely blown away by the range of distinct and usable tones that now come out of this single guitar. In particular, I love the ‘quacky’ sounds that come out when you reverse the phase. Also, having the ability to turn down the volumes without losing the high-end is invaluable and will lead to me using the volume controls a whole lot more. If you have an old Les Paul copy that is doing closet duty because you’re not impressed with the same-old sounds, I highly recommend looking into this mod.

