If you enjoy this how-to guide and decide to grab one of the items listed, please consider clicking through one of my links before you buy. I earn a small commission at no cost to you, which helps support this site and keep these informative guides coming. Thanks!
I’m a huge fan of DIY projects. Between a trip to my local hardware store and a few essential parts on Amazon, I can save hundreds or even thousands of dollars by doing it all myself. If you’ve been looking at rackmount audio gear for your home studio – or thinking about expanding your rackmount gear collection – you’ll need to consider the cost of a quality rack into your budget. In this article, we’re going to explore how to build a serviceable rack for your home studio gear step by step, and at a far lower cost than buying new.
Why Build Your Own Rack?
The short answer is ‘cost.’ You can buy a rudimentary desktop rack for about $35, or a freestanding rolling cart rack for around $150. Both of these options come with 12U of rackspace, meaning there are screwholes for mounting 12 single rack units, 6 double units, or a combination of the above. Or, by following the simple instructions in this article, you can build your own 20U rolling rack with nearly twice the mounting space for about $60-70 and customize it however you want. Obviously if you’re short on time or basic woodworking expertise then an off-the-shelf option might be better, but for my budget, building my own rack was a no-brainer in terms of value and customization.
Tools and Parts List

To build this rack, you’ll need the following tools:
- Saw – a miter or table Saw will provide a straighter cut, but a jigsaw or circular saw could be used in a pinch
- Hammer or Nail gun
- Drill with Screw Bits (or a screwdriver)
- Bar clamps (optional for gluing boards)
As far as parts are concerned, the beauty of building your own rack is that there are no hard-and-fast rules. You can build it as tall as you want, or in as many sections as you’d like, and use any combination of woods and finishes. If you want to build this exact rack as pictured, here are the parts you’ll need:
- 12 board feet of 1×12″ boards
- Finish nails
- 4 casters
- 1/2″ wood screws
- 2 rack rails
- Rack screws
- Wood glue (optional)
- Paint or stain (optional)
- Velcro straps or cable ties (optional but highly recommended)
The casters and boards for mine came from my local hardware store, and since this isn’t my first adventure in woodworking I already had a box of nails, a box of screws, and wood glue. I got two 6-foot quality pine boards for about $20, though I could have grabbed four 3-footers if they’d had any in stock. Also, I could have upgraded to more exotic hardwoods or bought paint or stain if I wanted to get fancy, but I just went with unfinished pine for now. I also bought two fixed casters and two swivel casters with locks, all 2-inch rubber, for about $12.
Because I already had two 12U rack rails from a previous rack build on hand I went ahead and reused them, however in the future I can easily throw in a new pair of 20U rack rails or extend it with two 8U rails. If I was buying new, I’d pick up this set of rack rails instead:
Once you’ve purchased everything and gathered all the parts and tools together, it’s time to build. Let’s get started!
Step 1: Cut the boards to length and assemble basic frame

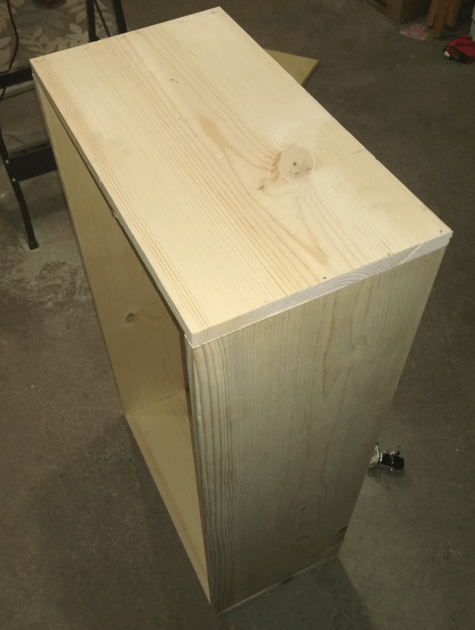
To make a rack big enough to accommodate 20U rack rails and standard 19-inch rack gear, cut the 1×12″ boards into four boards, two of each size, in the following dimensions:

The 36×12″ boards are for the sides, and the .20 5/8 x 12″ boards are for the top and bottom. The top and bottom are 20 5/8″ to accommodate 19-inch rack gear, which is actually 19 1/8″ including the rack rails, plus two times 3/4″ (1.5″) for the thickness of my 1×12″ boards. If you’d like to have a wider top or bottom, you can make it as wide as you want, just be careful not to make it too top-heavy.
Once the boards are cut, you can simply nail them together with finish nails. Optionally, you can also run a bead of wood glue along the top and bottom and clamp for extra stability. Once that’s dry, it’s time to move onto the casters. (If you’re doing extra finishing steps like routing the edges or painting / staining the wood, you should do that before installing any hardware.)
Step 2: Install casters

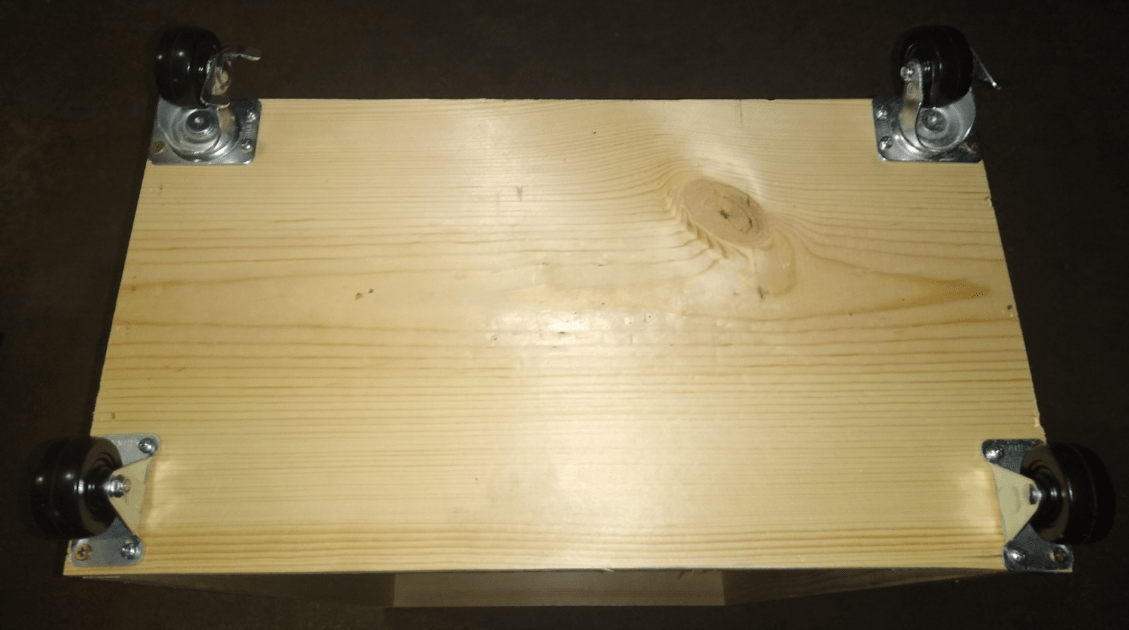
Filp your completed rack frame over and dry-fit the four casters on the bottom. If you’re using any fixed casters, make sure they line up for easily rolling the rack around. I chose to rotate my front swivel casters 90% to make the brake levers a bit more accessible from the front.
Once you’re confident you’ve placed your casters for maximum maneuverability, attach them with 1/2″ screws. A drill makes this fast and easy, but can be done with a screwdriver and some elbow grease in a pinch.
Step 3: Install rack rails

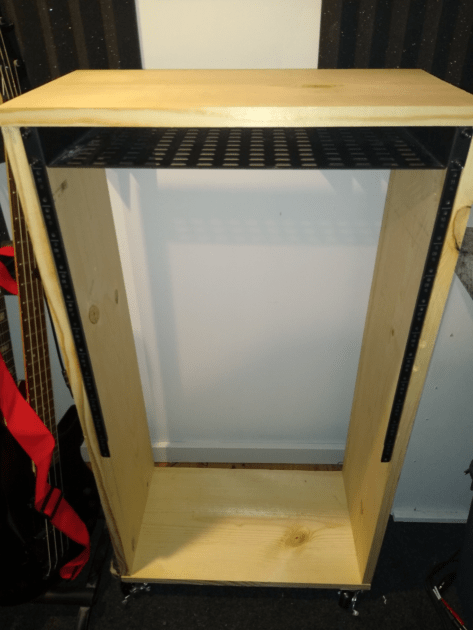
Our last assembly step is to install the rack rails. If you have a rack blank, rack tray, or other rackmount accessory about, you can install that on the rails and use it as a guide to help get the spacing perfect. Line it up, then screw the rails into the sides with 1/2″ screws. (Don’t be stingy with the screws, as they are all that are securing your thousands of dollars of gear to your rack.)
Step 4: Install all the gear and cabling

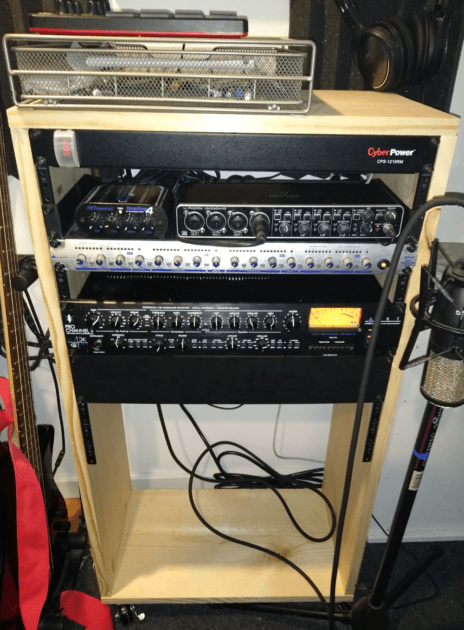
Now you can start putting your gear into your fully assembled rack. If this is your first time mounting rack gear, make sure that you don’t cross-thread the rack screws into your brand-new rack rails. I find that a bottom-up approach is the best, which allows you to use the already-secured gear on the bottom to hold the gear higher up the rails while you screw it in. Also, I like to leave a rackspace between any tube-powered gear for heat dissipation.
Once all the gear is mounted, take the time to carefully plug in all the cables. For good, clean wire management, wrap cables with velcro straps or cable ties and tuck away any excess the best you can. Good wire management is essential for usability, avoiding cable crosstalk, and effective heat dissipation. (Trust me, don’t skip this step. You’ll thank me later.)
Step 5: Crank it!

Now the fun part! It’s time to turn it all on, crank it up, and test it out. Once you’ve checked each piece of gear for proper function, you’re ready to start making music with your new homemade rack.
How To Build a Rack for Home Studio – The Bottom Line
I hope you found this guide helpful for building your own custom home studio rack. If you followed this guide and built yourself a new rack, we’d love to see pictures of it in our Home Studio Enthusiasts Facebook group! Stop by on #StudioShotsSunday (or any other day) and show us your handiwork, then stick around to ask questions and get help from our quickly-growing group of musicians just like you!

